04 Aug 2014, 12:27

Quest - Nice ride today w/Brian

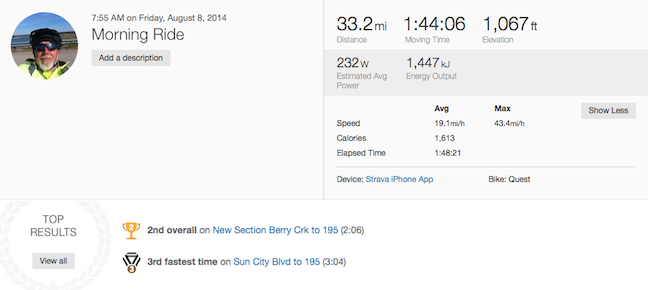
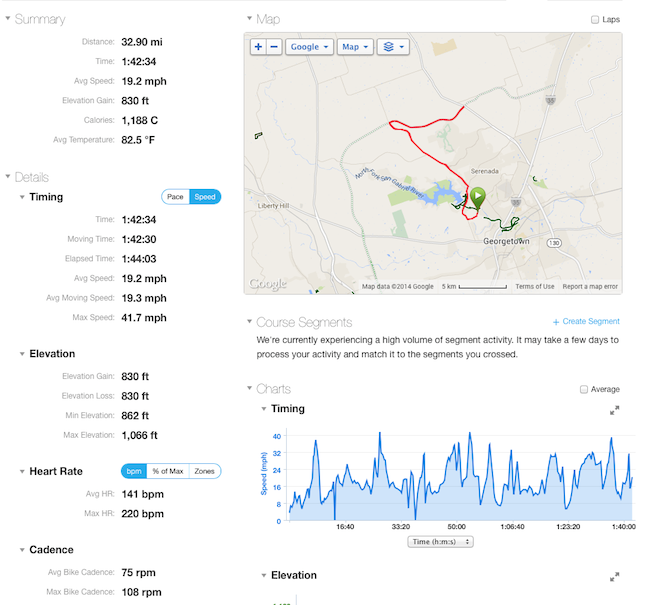
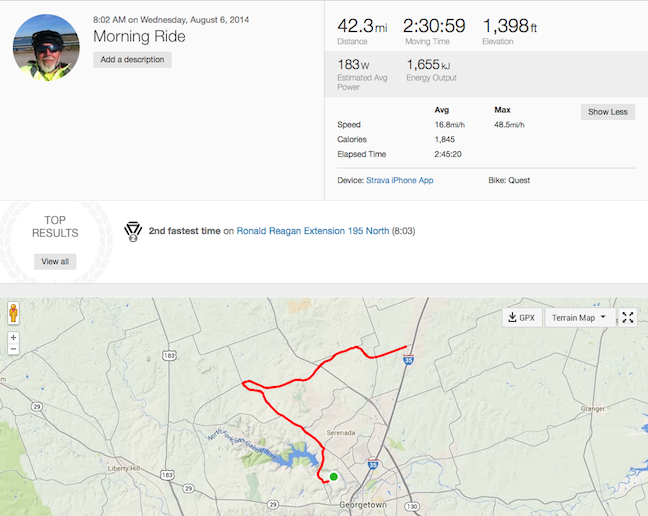
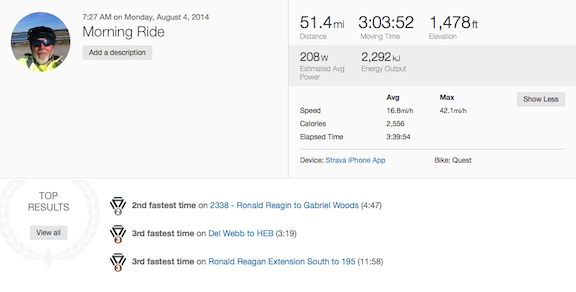
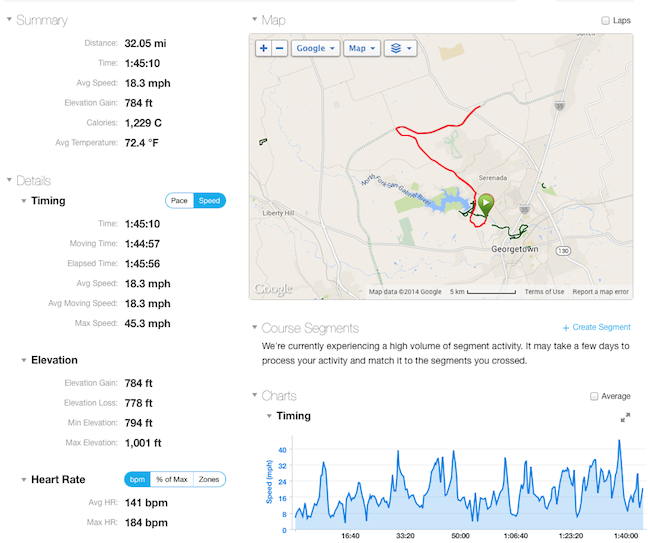
Went for a ride with Brian Buckmaster today to Salado. Legs are so hammered from the last two days of riding we turned around in Jarrell cutting the ride short to just 51.4 miles.

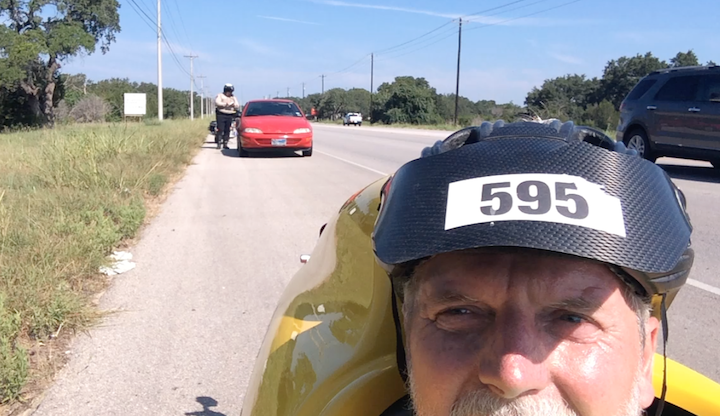
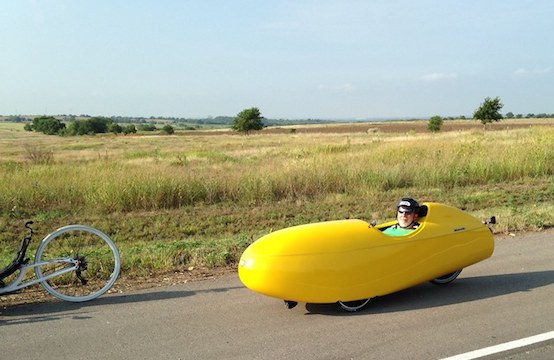
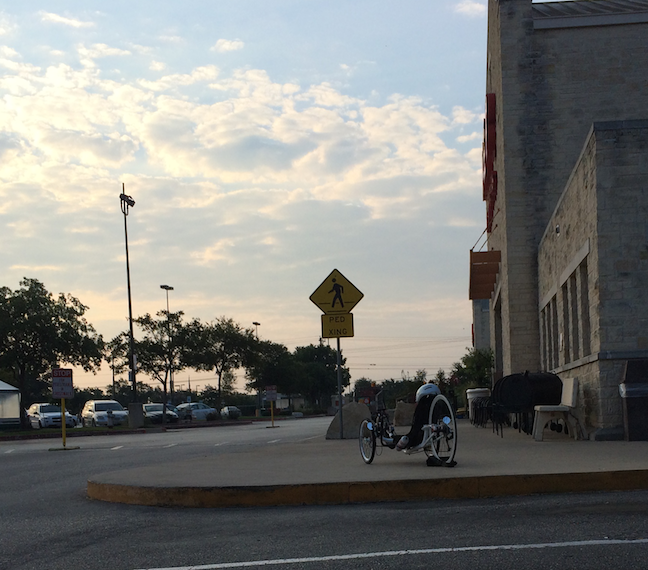
That is Brian’s ICE Vortex trike on the left.

bordered

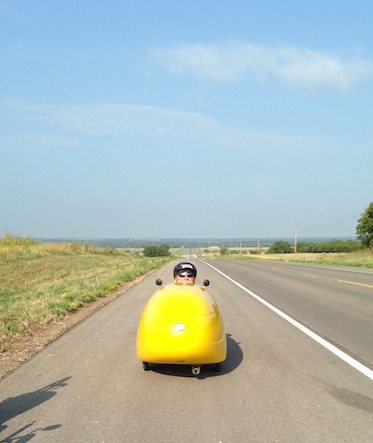
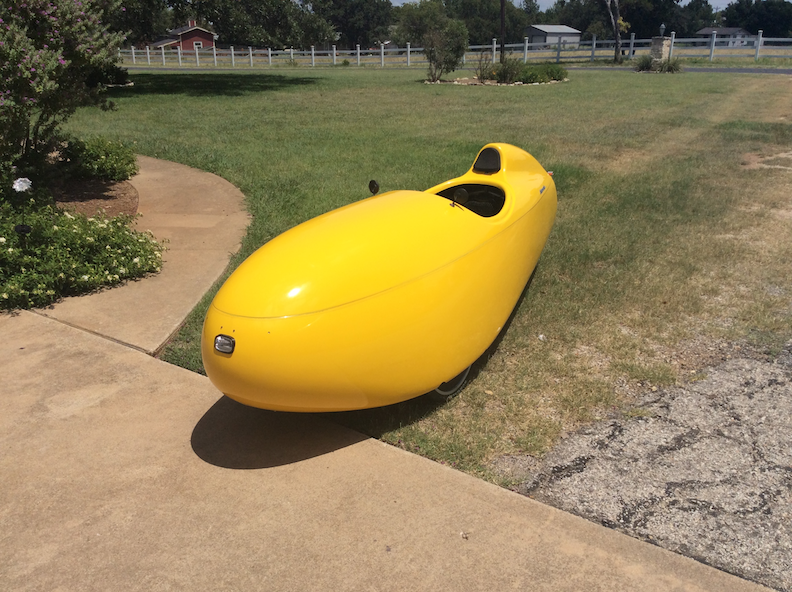
Shot of the front of the Quest Brian took (need to keep my feet inside for pictures).

bordered


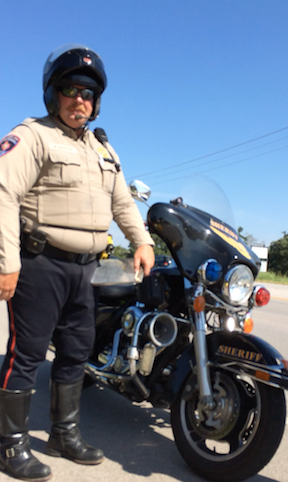
Brian and I arranged to meet at HEB at the corner of Williams and DB Wood. Brian got there before me and was inside getting provisions for the ride. Here is a picture of his ICE Vortex.

bordered


I took a couple of more links out of the chain before this mornings ride. Shifting is better, but I still need to take a couple of more out.

There is a strange ratcheting sound coming from the rear. Tomorrow I’ll take the rear apart and see what the noise is.


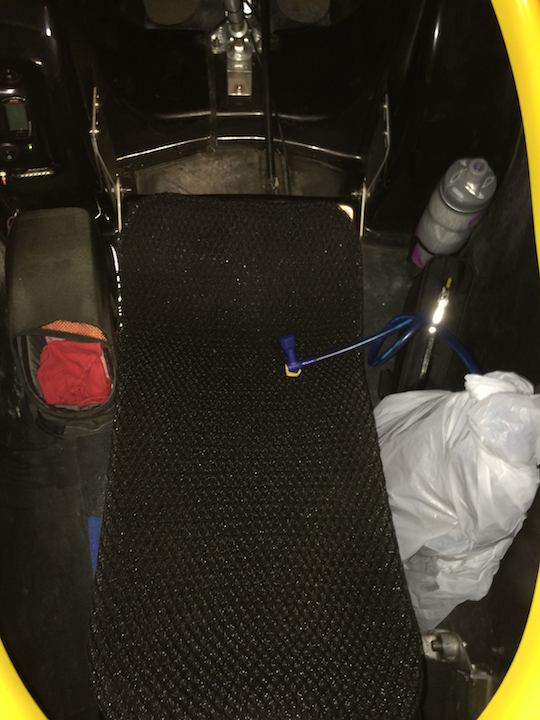
Today I got a better handle on storage inside the Quest. I took the rear luggage bag I use on the F-40 and put it on the left side of the Quest. I had previously cut a round hole in the top of the bag to hold the 64 oz insulated stainless steel growler I use on the F-40 during really hot days. The hole allows me to easily reach inside and fish around for stuff - food, gels, iPod, etc.

On the right side I have a water bottle filled with my own sports drink mix, a frame bag for my iPhone and my camelbak inside of a plastic bag. Yesterday when I had finished my ride condensation on the camelbak had formed a pool of water. So today I tried the plastic bag - worked ok - but I need to find my camelbak sleeve I made last year, it will keep the camelbak more insulated and at the same time contain the condensation.

There sure is a lot of room in the Quest.

bordered


Towards the end of the ride I tried Willie Hunt’s suggestion on climbing in the heat - put both arms outside the shell by leaning forward and resting on my armpits - this provides more airflow over the upper body for more cooling.

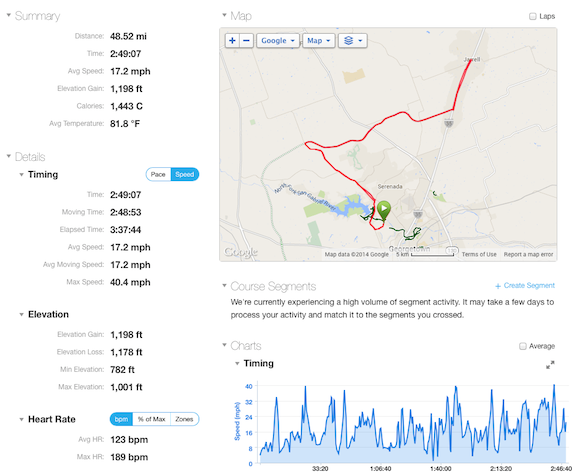
Well this also had another great effect - leaning forward caused my butt to slide backwards just enough that the peddling position was lengthened causing the strain on my hamstrings to disappear! Within minutes my left leg hamstring loosened up and I was really able to hammer it the rest of the way home. In the last fifteen miles of riding I increased my average speed from 16.0 mph to 17.2 mph on the garmin.


bordered http://www.strava.com/activities/175333239


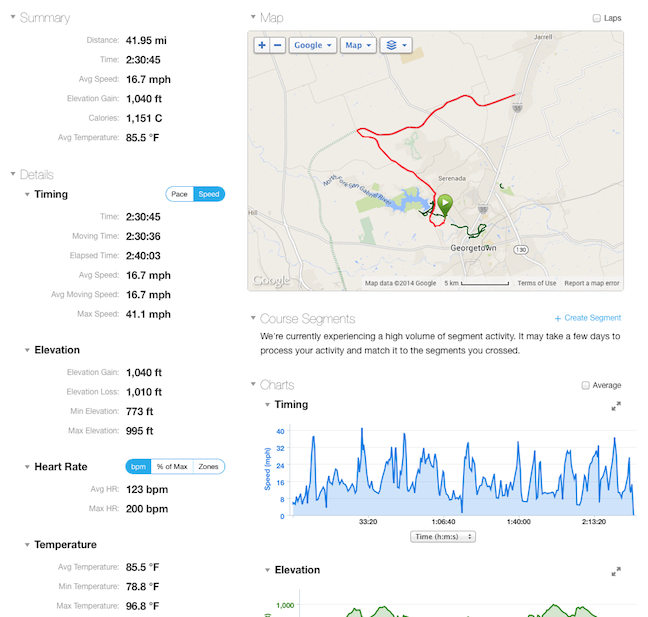
bordered http://connect.garmin.com/modern/activity/557071829

03 Aug 2014, 12:27

Quest - Video of 45 mph downhill

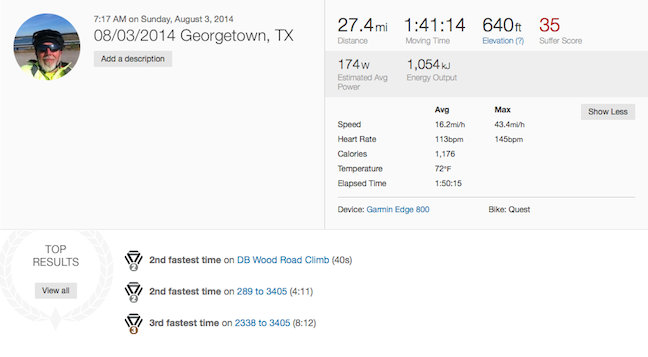
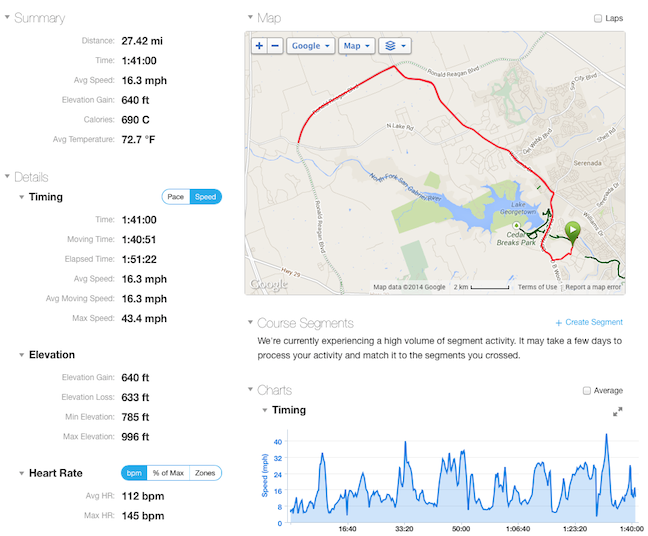
Second day on the Quest. Just an easy ride trying to build up my legs.

Lengthened the chain quite a bit. Too long now. When in small ring in front and smaller rings in the back the chain jumps and skips when under moderate pressure. When in the largest ring in the front I can shift through all the gears in the back ok. Now it is high speed is good - climbing really sucks because of the chain slipping.

I mounted the Garmin VIRB camera on the front of the shell exactly between the two front mirrors. The video view angle is great - but now my view is terrible because I keep having to lean my head to look around the camera. Taking the camera off now and I will try to find another place to easily mount it.

In the video you can see how the Quest on a downhill easily accelerates up to 40+ mph.


bordered http://www.strava.com/activities/174821439


bordered http://connect.garmin.com/modern/activity/557506205


02 Aug 2014, 10:03

Quest - First ride impressions

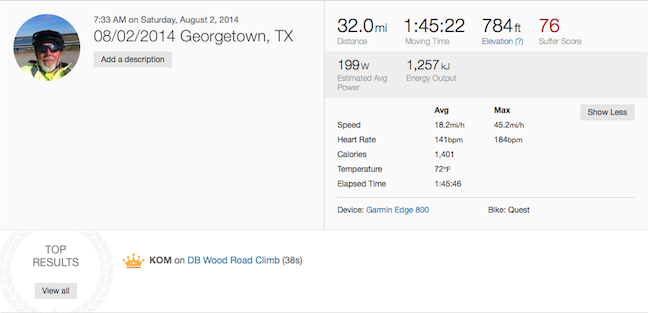
A nice easy training ride with one Strava KOM (42 mph) chasing down a very fit triathlete on a high end time trial bike.


bordered

Setup and Adjustments

Last night and this morning I spent a few hours adjusting the Quest for my x-seam and body height.

I must have had to push the peddles out at least 6 inches. The prior owner must have been very short.

I’m 6’ 1" and the fit is currently very tight. I sure if I were to lose some weight off my butt my x-seam will decrease by at least 3 inches. As it is my shoulders fit just below the rim of the Quest by about 1/2 inch - so I cannot raise the seat anymore to try and get my feet further away from the front. I cannot wear my Keen SPD sandals because at my current x-seam length the Keens are too wide and when peddling the outsides of the Keens scrap against where the top and bottom shells join. Fortunately, I had another pair of skinny SPD shoes that worked ok after adjusting the clips on the bottom. I had to adjust the clips on the bottom of the shoes as far to the outside as possible so that the outside of my foot would be as close to the bottom bracket as possible. This made the outside of my shoes be as narrow as possible allow the shoes to clear the joint where the top and bottom shells meet.

When riding every now and then the heel of a shoe will contact the front of the foot opening. Also, every now and then a knee will graze the top of the shell. Each is kind of a surprise each time it happens but not really all that disrupted to my peddling.

I did not have any additional chain so I was very careful to only shift out of the small front chain ring when I was in the little gear in the back. Needless to say this affected my average speed greatly. Today I’ll have to go get a couple of feet of chain and add it to the existing length.

When peddling at slow speeds there is a creak, creak sound every time I peddle. I’m guessing the struts need some oil - after all the Quest has been sitting in garage for the last 4 years.

Also, there is a ting, ting sound from the rear. I’ll have to check the rear spokes. One is either broken or loose.


Gearing

The high end of the gearing is not high enough. I spin out around 30 miles per hour. I don’t yet have the cadence sensor on the Quest but I’m guessing my cadence was ~90 rpm for just over 30 mph. The F-40 has a 60 tooth big chain ring and I don’t spin out until around 40 mph.


Ride Impressions

At speed (30+ mph) the wind noise is extreme - just like the F-40 before I put the windshield on it.

Getting up to 18 mph is hard. 18 mph to 30 mph is very easy compared to the F-40.

The Quest is very fast. Riding the F-40 for a year really helped me be very comfortable with the Quest handling at speed.

I’m going to need a lot more experience cornering.

The Quest easily accelerates through 30 mph on any slight downhill.

You cannot turn it around on a two lane country road without doing a 3 point turn. (3 being very optimistic at my current experience level)


Ride Strategy

Ride strategy is like the F-40 only more extreme. On any downhill accelerate as much as possible to try and turn the next uphill into a roller. The Quest is able to ‘rollerize’ more hills than the F-40.


This Morning’s Ride

It took me 40 minutes to get out of the driveway. My shoes kept hitting the front inside of the Quest.

Fortunately you can reach the ground over the side of the quest. Take my helmet and sunglasses off and set them on the ground. Take the Garmin Edge 800 off the tiller and put it in the helmet also. I need to take the Garmin off so that the tiller will fit under the lip of the opening to get the tiller out of the way so that I can push myself up and out of the Quest. I really need to work on my upper body strength with exercises like doing dips at the gym. I can see myself finishing a really hard ride and then not having enough energy left to lift my overweight body out of the stupid thing.

Eventually, I got the shoe situation sorted out and I was on my way.

The deer in the neighborhood go crazy at the sight of the Quest. The F-40 did not bother them - the Quest put them into a frenzy.

It is slow getting out of the neighborhood but after about a mile I’m on a pretty good road with wide smooth shoulders. The downhill to the bottom of the dam is an eye opener. Accelerating (and I use the term accelerate loosely) to 16 mph with the Quest takes some effort. But 16 mph to 30 mph is very impressive - way faster than the F-40.

I try to carry as much speed as possible up the next climb but I’m not used to the gears and I’m being cautious because I know my chain length is very short.

Heading out of town it seems like it is a good strategy to get the Quest up to 18+ mph and then rest while holding it there. Once at speed it doesn’t take much effort to keep it there.

At about the 10 mile mark I’m considering turning around but I’ve just turned onto a road where there are lots of roadies and the Quest is eating up the pavement.

I end up going another 6 miles passing many roadies doing at least 30+ mph in the Quest.

Right after I turn around to head back I see Brian and Suzie Buckmaster heading the other way on there upright bikes. So i turn around again and head back out to ride with them for a little bit. I’m coasting and ridding the brakes at 18 mph and they are peddling some while we are talking. After a little ways I decided I really should head back. I want to make sure I have enough energy to be able to lift myself out of this thing.

After I turn south on Williams Drive (about 9 miles left to go to my house) I notice a rider about 1/2 mile ahead. It takes me a good 5 miles to catch him and I’m easily averaging 29 to 30 mph. Neither one of us can talk or say hi as I pass - it is all we can do to try and keep up with the other. We trade places a couple of times. At stop lights and corners he zooms ahead, eventually on the long straights I catch and pass him. I get my one Strava KOM on a segment because we had just rounded a corner and he accelerate way ahead of me - I got the Quest up to 45.3 mph on the downhill and completed the segment with a 42.0 mph average.

After that I was only a couple of miles from home and my legs were toast. Time to just spin easy and try to make it home.


Time to soak the legs, have a beer with lunch and then do some maintenance on the bike.


By the Number

bordered http://connect.garmin.com/modern/activity/555201362


bordered http://app.strava.com/activities/174330580

02 Aug 2014, 01:32

Quest arrives home!

After driving 20 hours in two days my Quest is now home!

Unexpectedly, earlier this week a slightly used Quest came up for sale in western Texas. I have been wanting a Quest or quite a while and this was too good of an opportunity to pass up.

So Thursday I purchased QB028 from Bill Janss in El Paso. Even though it is 4 years old the Quest probably has less than 200 miles on it. All parts look practically brand new.

Hopefully in the morning I’ll get the fit better dialed in and be able to go for a short ride to see what this baby can do.

Some quick observations:

I cannot leave it parked anywhere without the parking brake on - it will immediately start rolling down the slightest incline to bang into the closest object.

Compared to the F-40 it is very noisy inside due to the shell vibrating.

It turns like a pig.

I love not having to unclip and put my feet down when I stop.

bordered

15 Jun 2014, 00:50

TiAero - Packing in SportsTube

I’m going to be traveling to Portland OR later this month and what to do some rides on my TiAero.

So I’m packing it up into a Sports Tube Series 3 which I purchased on Amazon for $199 dollars.

NOTE: These instructions include documenting my mistakes. Make sure to view all the pictures and read all the comments so that you don’t make the same mistakes - it will save you a lot of time.

The main goal to to leave all the cabling intact.

The page is divided into a few sections:

TiAero into a Sports Tube
Pre-disassembly Take pictures of everything on the bike first. Specifically, chain routing, cable routing.
Starting out Empty Sports Tube in front of the bike.
Remove chain The messiest part of the whole job.
Remove Accessories Pull easy stuff off the bike
  • Bottom frame bag
  • Headrest
  • Left side bottle holder
Remove seat Prior owner modified the seat.
Easy stuff gone The frame will all the easy stuff removed.
Removing handlebars Handlebars are tricky with the BFT.
Removing rear derailleur Tape to frame to protect from damage.
Trial fitting (wrong) Trial fit into the Sports Tube top.
Removing the front fork Easy to do with the Bacchetta Fine Tune (BFT) System.
Disassembly complete Everything off the bike, taped and bubble wrapped to frame.
Removing the front fork Easy to do with the Bacchetta Fine Tune (BFT) System.
Disassembly complete Everything taped and bubble wrapped to frame.
Trial fit bottom tube (correct) Put into the bottom tube first.
Accessories Start cramming other stuff into the tube you will need.
Packed up and ready to go Except the wheels and seat.

Pre-disassembly

I’m not very good when disassembling and assembling stuff - I always seem to have parts left over. Probably not a good thing with a bicycle. So here I’m documenting everything for two reasons: 1) so that I can get the bicycle back together correctly once I arrive at Portland, and 2) so that I can put the bicycle back into the Sports Tube when returning from Portland.

Side view
Front left quarter
Front chainring left quarter
Front chainring left side
Front handlebars
Handlebar stem through frame
Rear left wheel
Rear left seat back
Rear right quarter wheel derailleur
Rear right side wheel derailleur
Rear right side seat stays
Rear right side brake
Right side idler
Right front chainring
Right front chain routing
Right handlebar top cable routing

Starting out

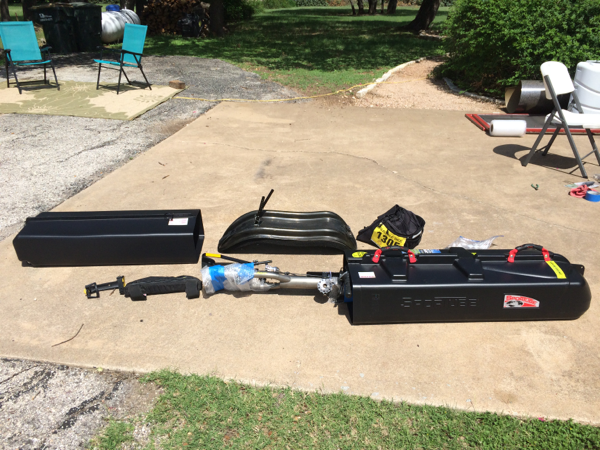
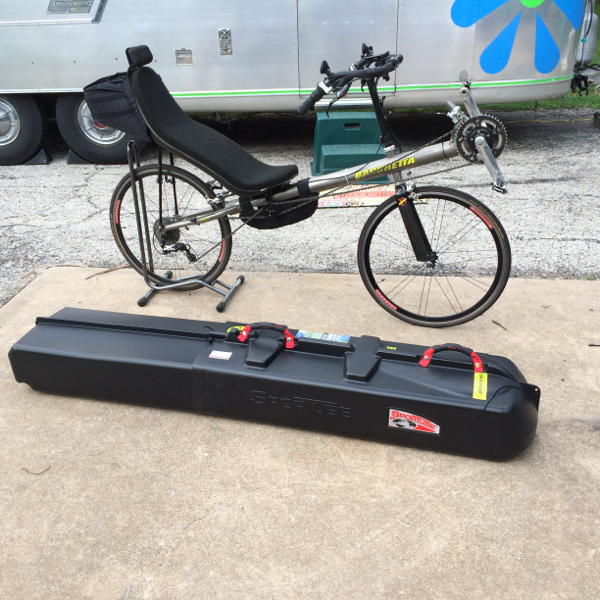
Empty Sports Tube next to the bike.

This is a Series 3 Sports Tube. You need the Series 3 height and width so that the handle bars will fit.
bordered


Removing chain

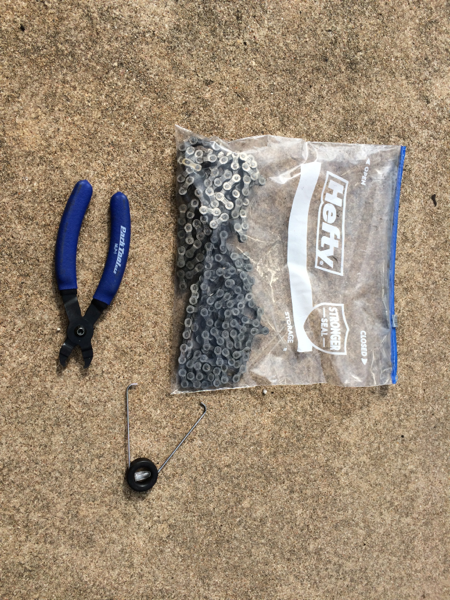
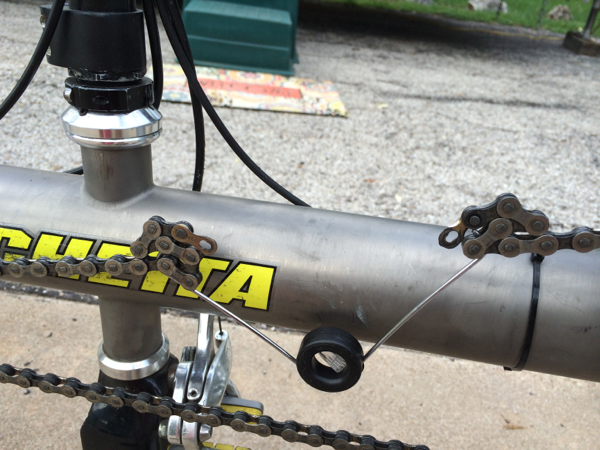
Remove the front wheel. Find the quicklink on the chain and remove it. Put the chain into a plastic baggy.

Set all the tools you use aside. You will need to put them into the Sports Tube before closing it up. You will need them to reassemble the bike at your destination.
bordered


bordered


Remove Accessories

Now we start removing all the easy stuff from the bike.

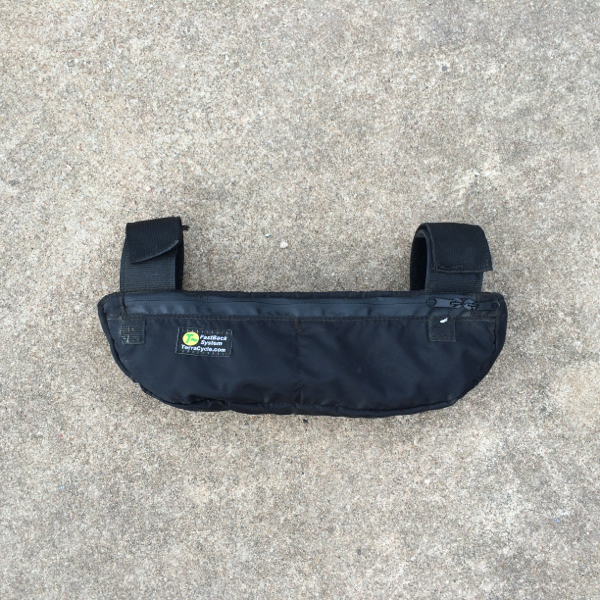
The frame bag.
bordered


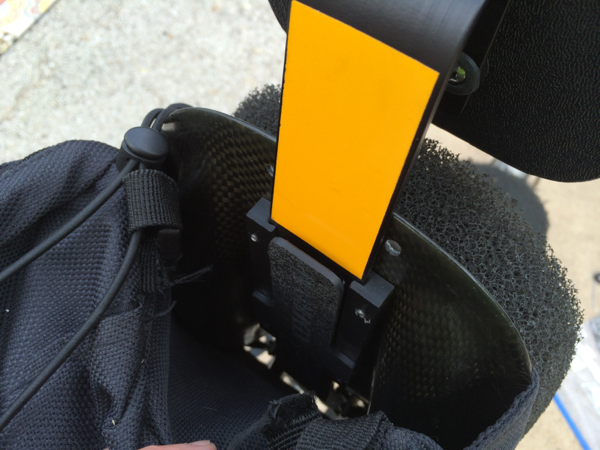
The headrest. Pull the plastic tab below the yellow reflector away from the seat and slide out the headrest.
bordered


Remove the water bottle holder on the left side of the bike. In general anytime you pull something off the bike put the screws back in where they came from so that they are easy to find and use when putting the bike back together.
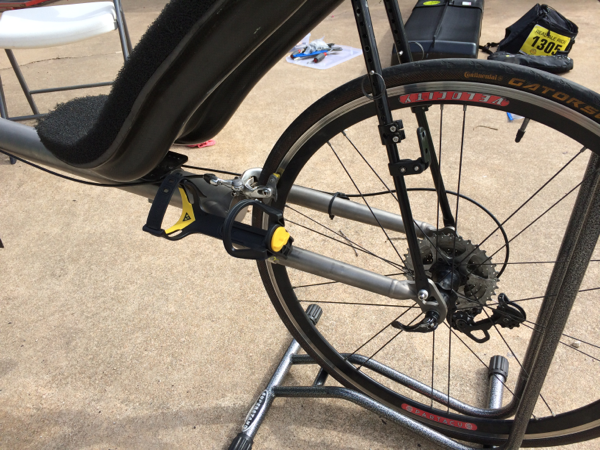
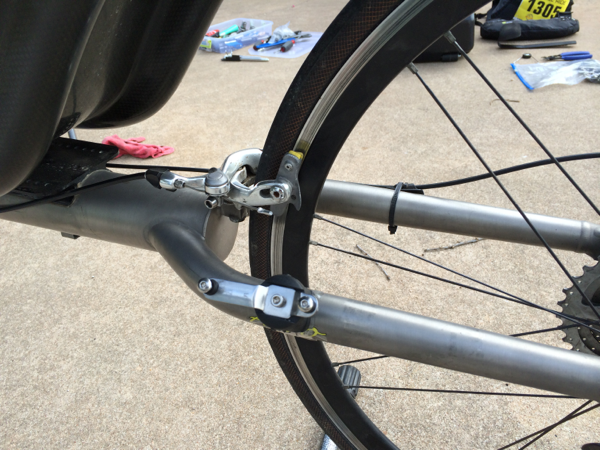
bordered


bordered


Removing the seat

Remove the 2 inch foam seat pad (held on with velcro). Remove the carbon seat.
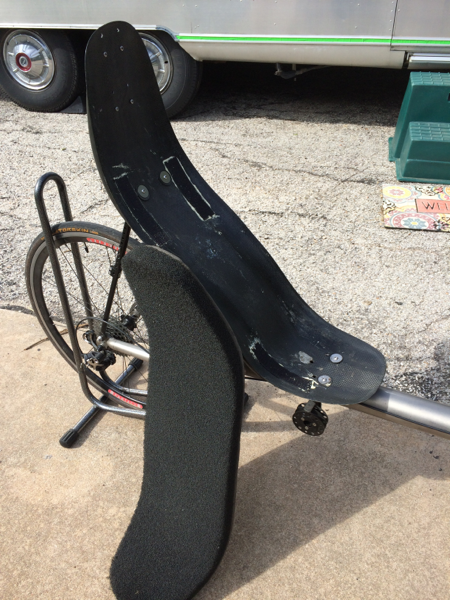
bordered

I got this TiAero used and the previous owner drilled a couple of extra seat holes in the front of the carbon seat.

Probably because when you use the original holes and recline the seat as far back as possible the front of the carbon seat tends to dig into your hamstrings.

I have played around with various seat positions and like the way it is currently configured.
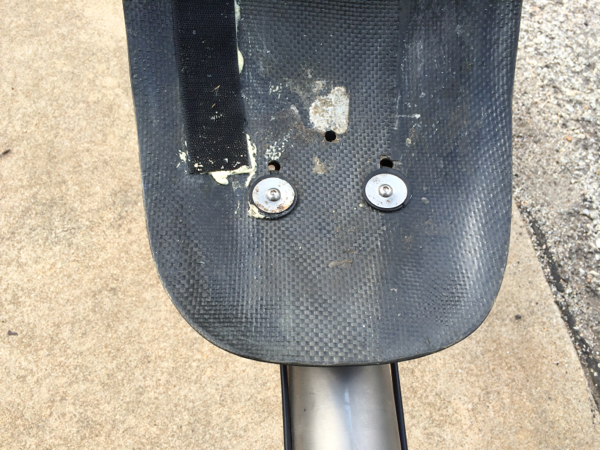
bordered

After removing the removing the nuts and bolts on the seat bottom put them back on the seat along with the rubber cushion spacers. I put a tie wrap in the hole were the seat was anchored.
bordered


I have purchased these joiners to use on the back seat stays instead of the cotter pins that come normally. Now I just have to loosen the top bolt and pull the seat up and out. The joiners stay in place and remember where I had the seat back angle set.
bordered


I folded the bottom seat stays down to be as close to the frame as possible.
bordered


Easy stuff gone

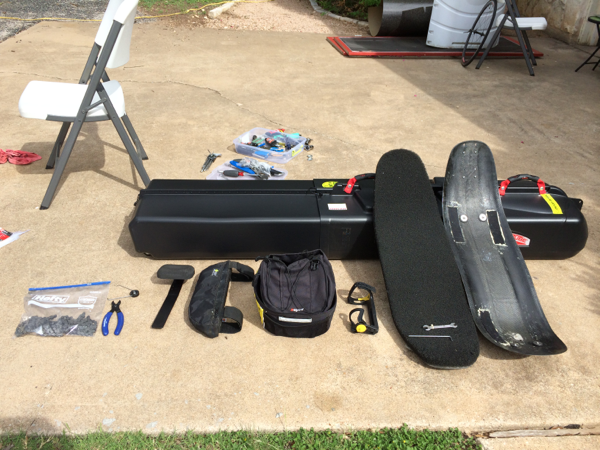
Picture of what has been done so far.
bordered


All the stuff removed so far from the bike.
bordered


Removing the handlebars

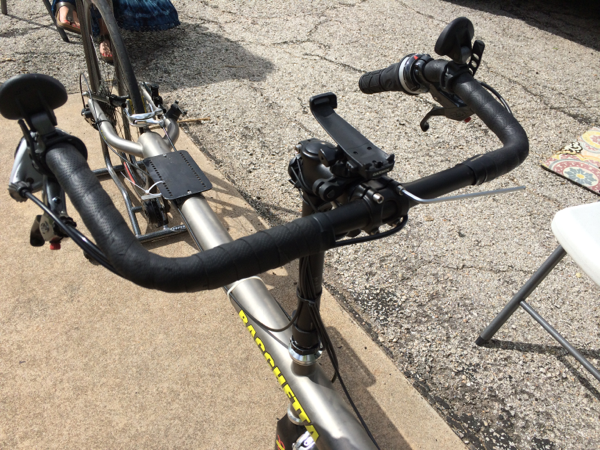
Loosen the coupler at the bottom of the stem, remove the stem, rotate the handlebars and tape them to the frame. I use blue painters tape. Sticks good enough and removes easily later.
bordered


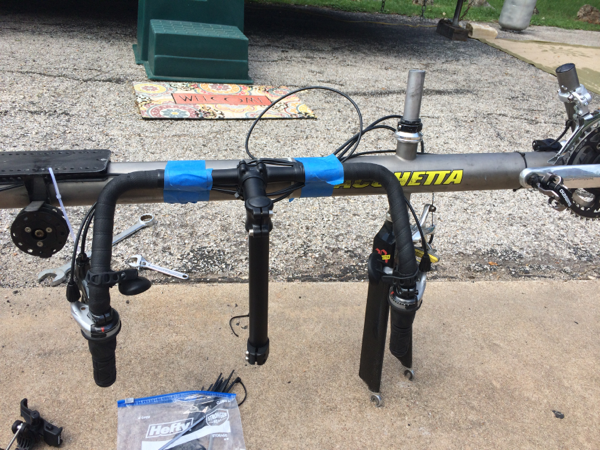
Here is my first mistake. Turns out that in order to get the handlebars (when taped to the frame) into the tube you need to also remove the stem from the handlebars and tape the handlebars to the frame such that the frame is centered in the middle of the bars. Don’t worry there are pictures of this below.
bordered


Removing the rear derailleur

Remove the rear wheel.

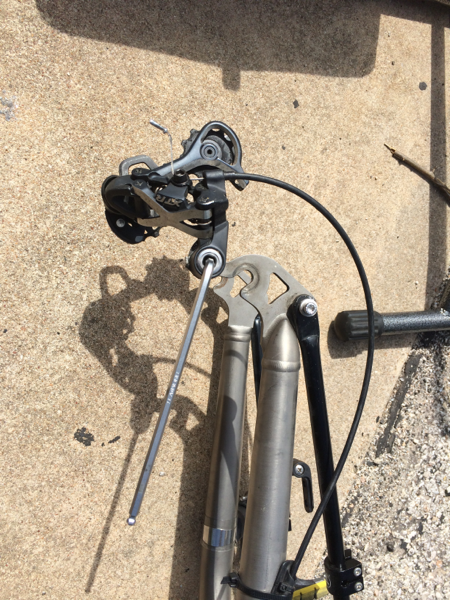
Remove the rear derailleur, wrap in bubble wrap and tape the derailleur to the inside of the rear frame.
bordered


Trial fix into Sports Tube

I made a couple of mistakes here.

The bike should be fitted first into the bottom tube (not the top like the pictures) - then the top tube just slides easily over the bottom.

I could not figure out how to get the front fork out. So I trial fitted as much as I could. Notice that I have lengthened the tape that holds the handlebars so that the frame is now centered in the bend of the handlebars.
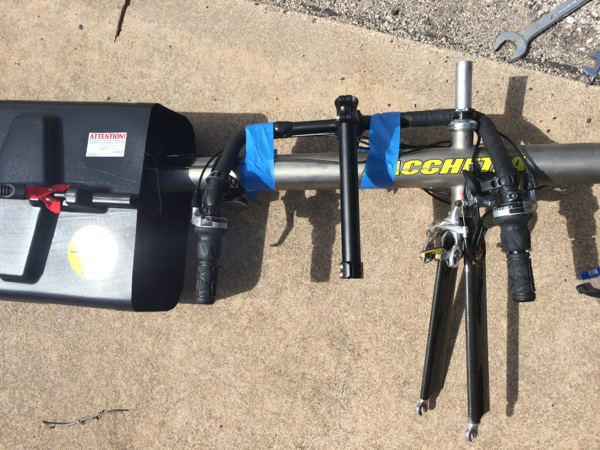
bordered

Sliding in the assembly the handlebars with the stem attached are becoming a tight fit. Only later when I try to fit the assembly in the bottom tube do I realize that the stem must be removed from the handlebars to fit into the smaller bottom tube. (I show a picture of that later)
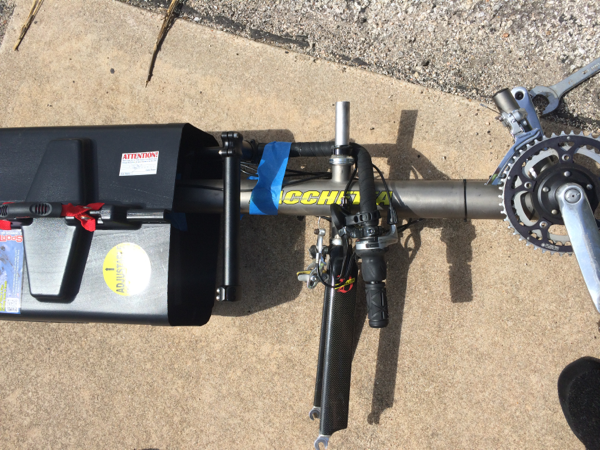
bordered


Removing the front fork

I had a hard time figuring out how to get the front fork off. Looking up online I discover that the front fork is held on by the Bacchetta Fine Tune (BFT) system. Loosening up the small set screw on the BFT allows it to just slide right off.

Be careful because the BFT is the only thing holding the headset bearings in place.
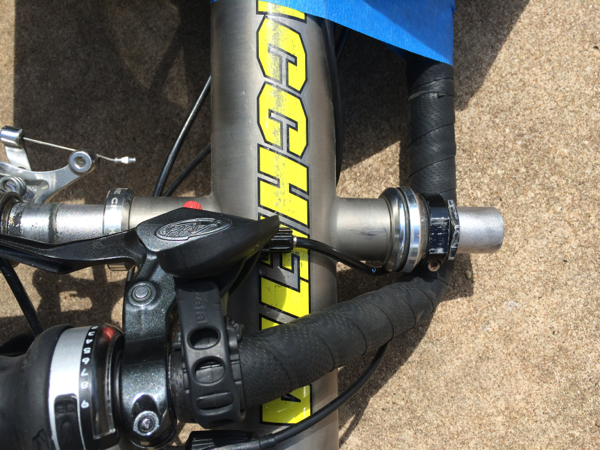
bordered

Here you can see that I used two tie wraps (one on each side) to hold the bearings in place on the frame.
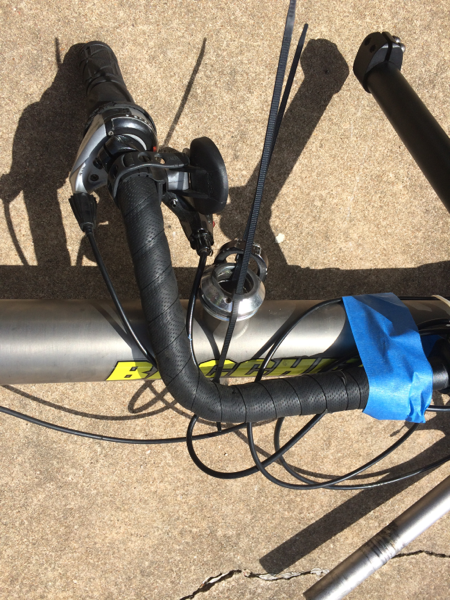
bordered


Now that I have the front fork off it is time to wrap it in bubble wrap and tape to the frame.
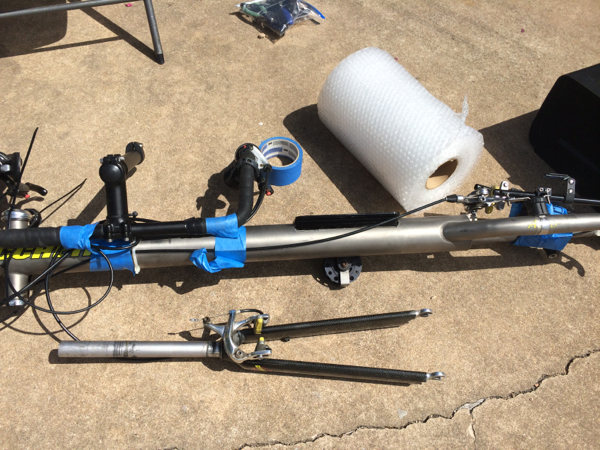
bordered


Disassembly complete

The completed disassembly. Bubble wrapped and ready to put into the Sports Tube.
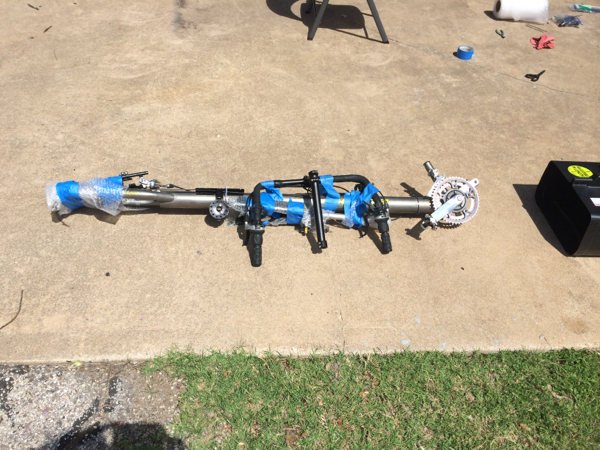
bordered


Trial fit top tube

Here I’m showing putting into the top of the Sports Tube. Only after getting it all in did I realize that in order to fit the two halves of the Sports Tube together you really need to initially fit the frame into the bottom of the Sports Tube first and then the top part just slides over the bottom.
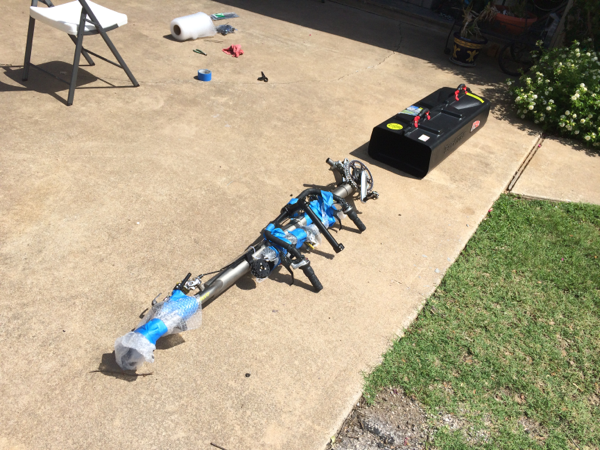
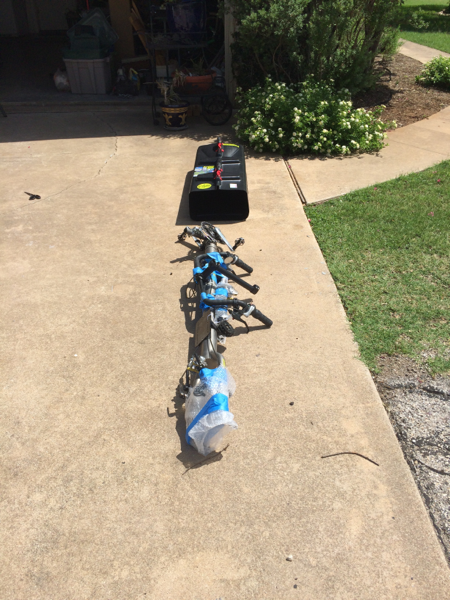
bordered


bordered


bordered

bordered


Now I realize that with all the stuff in the top part of the Sports Tube I am not going to be able to slide the bottom inside of the top.
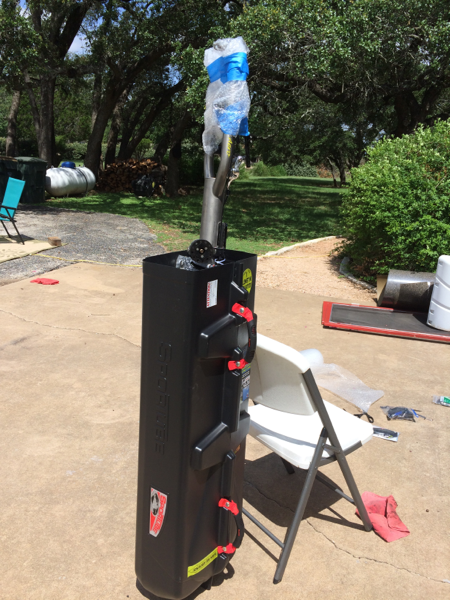
bordered


Trial fit bottom tube

Alright lets start over. Put the frame into the bottom part of the Sports Tube. But first put the X-Eye seat back bag into the bottom of the Sports Tube, then put the frame in chainring first.

Here I noticed that I really needed to remove the stem from the handlebars in order for the assembly to be able to slide into the bottom tube. Remove it and wrap in bubble wrap then tape to frame.
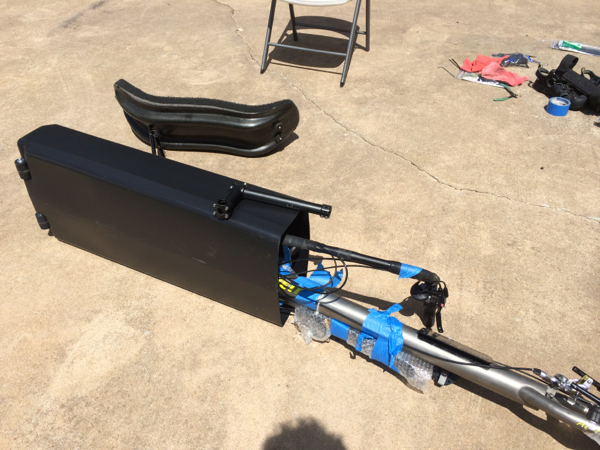
bordered


Accessories

Now start cramming everything you are going to need into the bottom sports tube. Shoes, clothes, tools, sunscreen, etc., etc..
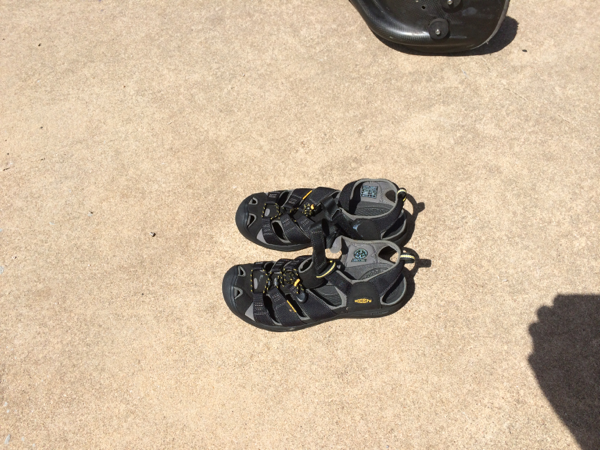
bordered


Complete

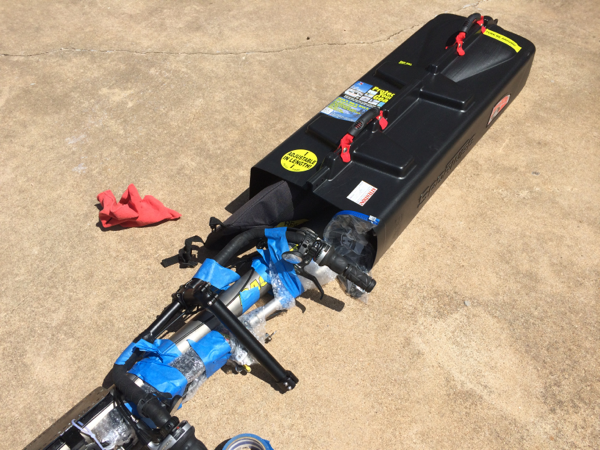
Slide the top onto the Sports Tube.

The seat would fix into the tube but it was really tight and I was worried about it breaking during shipping. I’ll just take the seat and wheels with me on the plane.
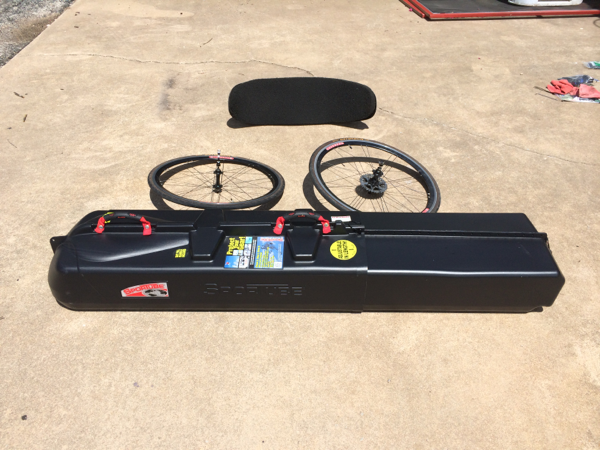
bordered

31 May 2014, 21:04

Homemade Sports Drink

I looked online at several recipes for mixing your own sports drink and finally settled on one that has worked out pretty good.

The recipe for a four hour bottle is:


3.0 cups of water
2.0 cups of maltodextrin (1000 calories)
3/4 scoop GNC chocolate flavored whey protein (100 calories)
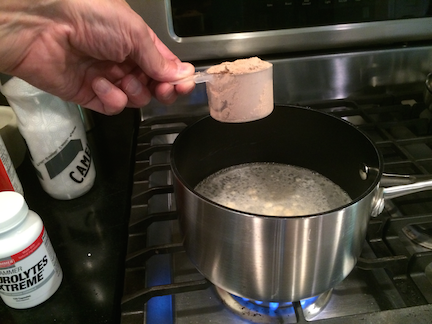
6 capsules of Hammer Endurolyte Extreme 

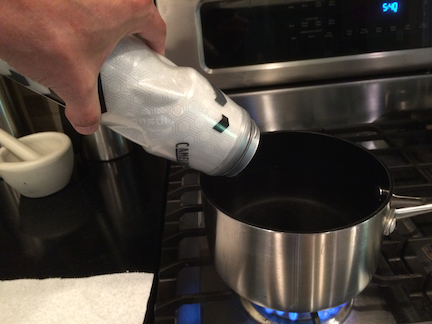
Bring the 3 cups of water to almost a simmer. 
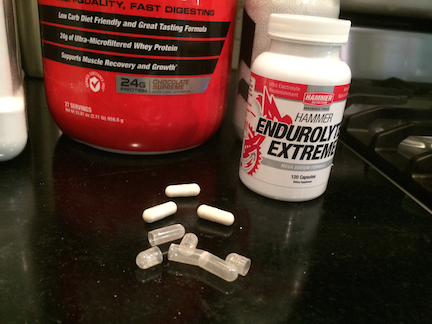
Pull the 6 endurolyte capsules apart and empty the contents into the water.
Put the scoop of chocolate whey protein into the water.
Slowly stir in the 2 cups of maltodextrin making sure it fully dissolves.
Once fully dissolved pour into a 26 oz water bottle.

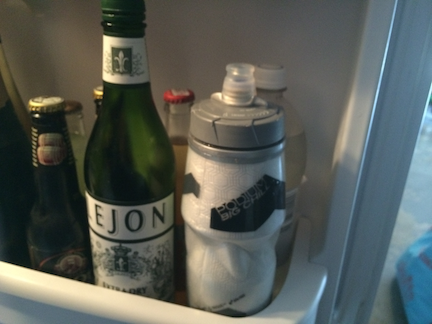
Do this the night before the ride and put in the refrigerator overnight so it will be cold the day of the ride.

Drink 1/4 of the bottle every hour on the hour.
This will give you about 275 calories per hour and the necessary endurolytes.
You will need to drink at least 8 oz of water when you drink the 1/4 bottle, otherwise the osmolality of the maltodextrin is too high for your stomach.

It turns out that there are a couple of non-obvious things involved when mixing up the drink.


The total time to make the mix is about 5 minutes.

Use your water bottle to measure the amount of water required.

Fill the water bottle you are going to use up to an inch from the top with water. All of the other ingredients are going to dissolve in the water and hence not add any volume to the mix. You want to leave an inch of space at the top of the bottle so that you can shake the bottle contents easily when you are done.

Pore the water into a pan an place on high heat.

bordered

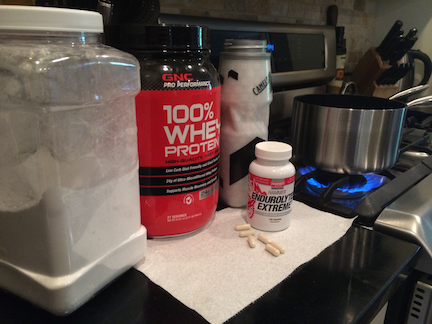
While the water is heating gather your ingredients together.

bordered

Pull the capsules apart over the heating water and let the capsule contents empty into the pan. The instructions I found on-line said 4 capsules but I sweat a lot so I’m using 6 capsules in my mix.

bordered

Now add about a scoop of whey protein. The measuring scoop comes with the whey protein and is usually just resting on the top of the whey when you first open the whey container.

bordered

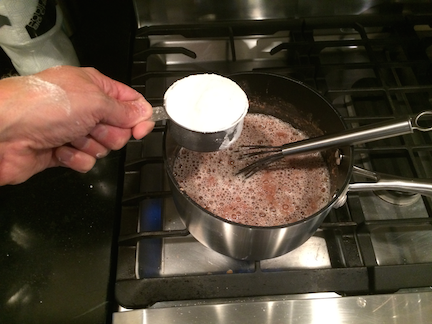
Once the water starts coming to a simmer you can add the maltodextrin. You will need a whisk to constantly stir the water while adding the maltodextrin. I add 1/2 a cup at a time while stirring. Wait for the 1/2 cup to dissolve before adding another 1/2 cup. I use 2 cups total of maltodextrin.

bordered

Once the mixture is fully dissolved (you may have some small chunks of protein) pore the mixture into the bottle. Make sure the top is fully closed and then shake the bottle pretty good. Before putting the bottle in the refrigerator you will need to open the top. If you forget to open the top before putting the bottle in the refrigerator then in the morning the bottle will be crushed because the hot expanded mixture will shrink while it cools and collapse the bottle because air cannot get in through the top.

bordered

Probably the hardest part of all of this is remembering to make the mixture the day before so that it will be cold the day of the ride.


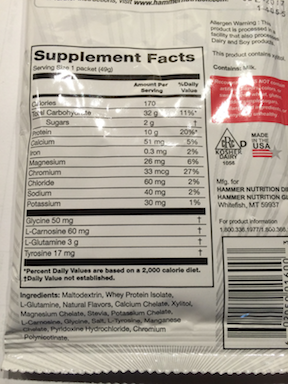
Interestingly enough when I ordered the Hammer capsules they also sent me a bunch of samples of their other stuff.

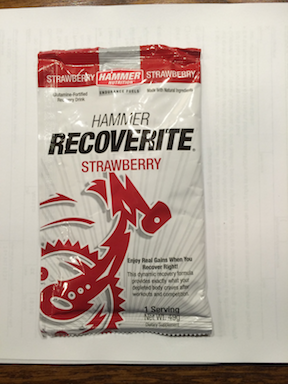
One thing was their Hammer Recoverite Drink.

Looking at the back of the package it has the exact same ingredients used in my sports drink.

The difference is that the Hammer Recoverite costs $3.25 per package and the equivalent amount of my sports drink costs $0.13 cents.

19 May 2014, 04:33

Another big tailwind, another lost KOM

These tailwinds just have to just stop.

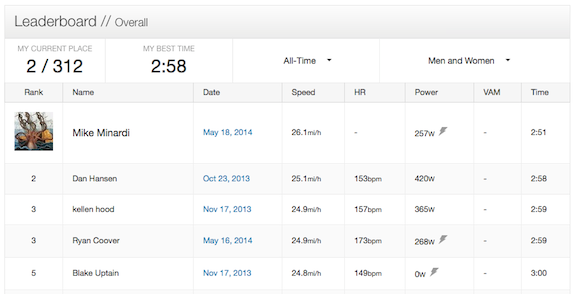
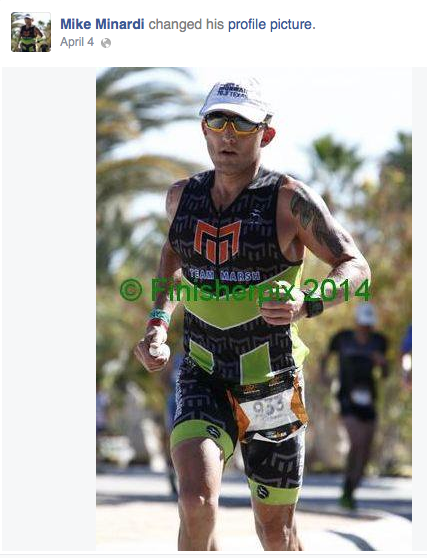
Another day, another 18 mph tailwind gusting to 26 mph, and another professional triathlete beats my Strava KOM by 7 seconds.

This old fat guy is starting to get perturbed.

bordered


bordered

bordered

18 May 2014, 01:09

TiAero - Real Ale Ride Report

This ride is definitely a love-hate relationship.

Next year I need to remember to take the P-38 which is a climbing machine.

The hills are horrendous on this ride. The first 19 miles were very difficult and not much fun. The last 11 miles were incredible.

The beer afterwards was first rate!


Start of the real all ride.

This year CT (my son-in-law) and I decided to start towards the back of the pack of 30 miles and just take our time.

Well, I brought the wrong bike for that strategy.

The first couple of miles are downhill and into the wind. There were a couple of thousand riders in front of us and I spent most of the first hour riding the brakes because of all of the bicycle congestion.

Here is a short clip of the mass start with about 2,000 riders in front of us.

At the very beginning the rider in the red jersey directly in front of me is my son-in-law CT.

We quickly coasted though town (Blanco) so that we could get to the fun (?) hills.


Five miles into the ride I get trapped behind a slow moving upright on a pretty steep hill. To late, and too much traffic, to unclip and walk up the hill I’m forced to grind my way up in my lowest gear at an incredibly slow pace - so slow I have to wiggle the handle bars back and forth at an extreme rate just to maintain my balance.

This really makes my legs toast and stresses my left knee bad. Immediately at the top of the hill I have to pull over and recover. From then on I’m walking every hill.

bordered


A very common sight - me walking the hill with CT already having zoomed up and waiting me at the top.

Note: My new favorite acronym I learned recently from my health field friends - NSAIDS (Nonsteriodal Antiinflammatory Drugs, ie Motrin). I needed them after this ride.


Here it comes - the big downhill. Two hours of horrendous climbing hills so that I can have 2 minutes of extreme fun. By this time I’m very tired and since two years ago I got up to 50 mph on the slower Musashi I decided that I needed to be more cautious this year and started immediately using the brakes to try and keep the speed down.

Shortly after starting the hill a mountain biker rides by and I try to stay behind him. Of course, even riding the brakes, I still get up to 42 mph - with the mountain biker still in front of me! It took me awhile but eventually I caught up with CT.

From here on to the finish the big hills are gone and now the route turns into a very-friendly-to-recumbents enjoyable ride.


The day was gorgeous! It was a bit windy but for the most part the wind was always blocked by the trees and hills. The last several miles were directly into a headwind, but with the TiAero it did not make a difference and the roads were smooth and slightly downhill making for a fast finish.

CT finishing the ride!

bordered


Family time

After the ride I drove CT home and then spent some time with CT, my daughter Alyssa and the grandkids!

CT does some good homebrew beer. Had a couple of glasses of a very nice stout while icing down the left knee and gabbing with the family.

bordered

It was a great day!


By the numbers

This was my third Real Ale ride.

  • 2014 : TiAero 29 miles in 2:18 elapsed time
  • 2013 : Did the Bosque Tour de Norway instead
  • 2012 : Musashi 29 miles in 2:30 elapsed time
  • 2011 : Musashi 65 miles in 4:29 elapsed time

My time was hindered this year because yesterday I rode 70 miles and of course today at the beginning of the ride I toasted my legs.

bordered

http://connect.garmin.com/activity/501417414


Next ride - 24 Hours in the Canyon http://www.24hoursinthecanyon.org May 24th.

16 May 2014, 02:13

F-40 Bummer, lost my KOM to a Cat3 Racer

Yesterday there was a 21 mph (gusting to 30 mph) tailwind on a Strava 5.1 mile segment that I have owned the KOM for six months now by almost a whole minute.

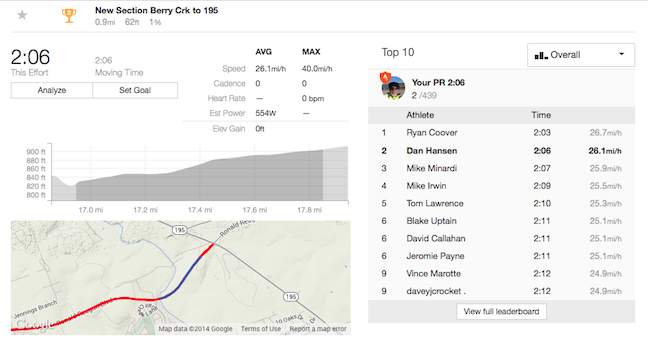
Well yesterday Ryan Coover, a professional Cat3 racer, used the good tail wind to beat my KOM by 23 seconds averaging 29.1 mph for the 5.1 mile segment.

Damn, that is fast!


My excuse is that it was dead calm when I got the KOM.

I’ve made significant changes to the F-40 to make it faster and I’m now much more experienced riding fast on the bike.

After losing a little bit of weight I should be able to do that segment at 30 mph next time (a slight tailwind wouldn’t hurt either).

I guess it is time to get back into shape and maybe in October try to reclaim the KOM.


bordered


bordered

16 May 2014, 02:01

TiAero - Easy 70 miles today

Beautiful day for a ride!

70 miles to Salado and back with Brian Buckmaster on his ICE Vortex. Stopped in Salado at the Stagecoach cafe for breakfast.

A little windy on the way back - winds 18 mph gusting to 25 mph.


Nice video of following Brian downhill @ 33 mph.


bordered

http://connect.garmin.com/activity/500669483